Touken Ranbu – Koban Storage
- fansideoflife
- Nov 25, 2021
- 6 min read

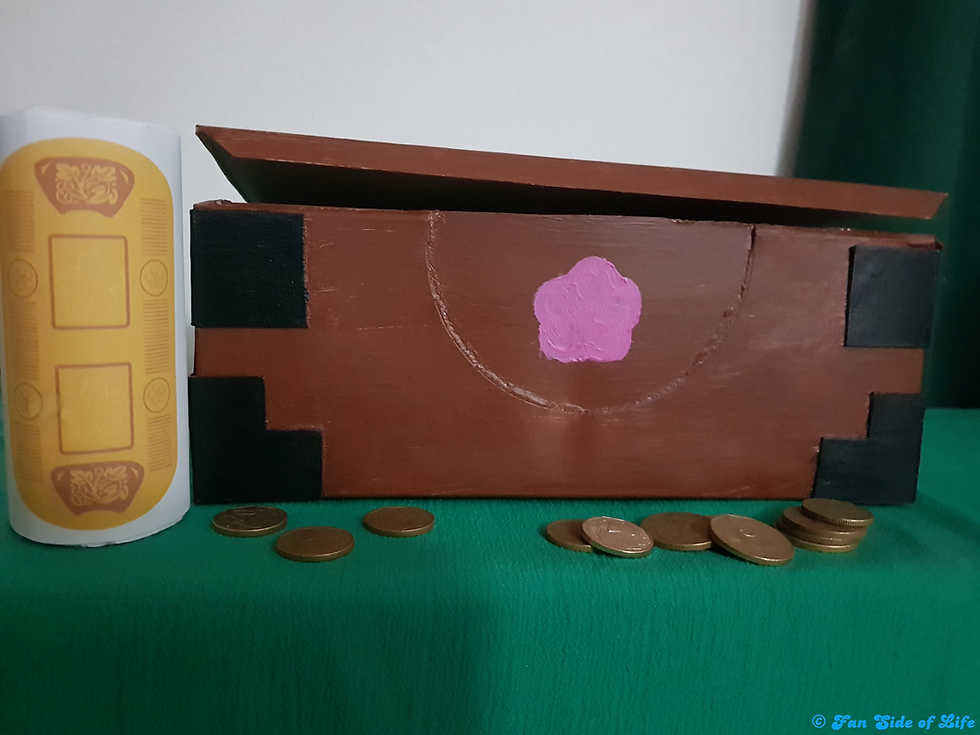
A fun Touken Ranbu styled ‘piggy bank’ to help you save your loose change.
(Note: The following ‘instructions’ are simply a guideline. This is just what I did to make my chest and koban storage units. Please feel free to do things your own way with whatever materials you prefer to use and/or have to hand.)
Materials and Tools:
• 2 x Tissue boxes.
• Cardboard (I was using an old tea box, off cuts from the tissue boxes and the back of an A4 writing pad).
• White craft glue.
• A4 White paper ~ 3 sheets for printing and 1 sheet for crafting.
• 10 x Toilet Rolls. (Or however many will fit in your box.)
• Cello tape.
• Masking tape. (To hold down parts that had just been glued, when needed.)
• Pencil.
• Scissors.
• Printer.
• Acrylic paint (and associated equipment – palette, brushes, water container).
Method - Chest:

(Warning: I pretty much winged the whole construction of the chest. I knew what I was aiming for and did my best to achieve it. So, please feel free to do the same with whichever box you chose to make into your chest.)
(Tip: I highly recommend doing little rough sketches of what you’re intending to do for each side of the chest. Also, make life-sized paper cut-outs of your ‘metal’ corners to get an idea of how big you really want them to be. You’ll be able to see my cut-outs below.)
Cut off the top of your tissue box to create an open box.
(Repair any parts that come adrift when you cut, if necessary. One glued flap on the side of mine came undone when I cut the lid off and I had to glue it back into place.)
Carefully deconstruct your second tissue box by pulling the glued bits apart. This box will become the lid of the chest as well as the interior of the front.
> For my lid, I chose a piece with a natural hinge attached to turn into the lid with hinges.
- I measured my box and figured out where I wanted the hinges to be and how big I wanted them to be in conjunction with the ‘metal’ corners of the chest.
> I then cut off the remaining full panel of the box and used it as the interior of the front of the chest; to fill in the U-shaped hole in the front of the tissue box. (I glued this in place and allowed it to dry before I glued the hinges on.)
*As you glue on pieces, allow each one to dry completely before continuing onto the next. (You can begin constructing your koban storage units while you wait for the glue to dry.)
Cut out your ‘metal’ corner pieces from your cardboard.
> I used the back of an old A4 writing pad; it had thicker cardboard than the tea or tissue boxes thus raising the pieces a fair bit above the tissue box for what I felt looked like a better texture.
- As you can see here, I had paper cut outs I’d used to check their ‘single side’ size against the actual box before cutting. (Complete with alteration notations on the notched one.)

~ To make the full corner piece, I doubled the length of the pieces on the cardboard before cutting. (E.g. 3x3cm became 3x6cm. 3.5x3.5cm became 3.5x7cm.) I also cut the notched pieces out as a full rectangle and then cut out the 1.5x1.5cm notches on their respective ends afterwards.
> Score a line with your scissors down the centre of your corner pieces; the spot where they’ll fold to go around the corner of the chest. This will aid the cardboard in folding nicely and not tearing.
> When gluing your corner pieces to your box, use a little masking tape to hold them in place.
- I glued my corner pieces on in two waves; first the top units, then the lower units.
Now it’s time to paint.
> I painted the whole chest white first and then layered on the colours afterwards; allowing each layer to dry in between.
- I feel I should have painted the black of the corner pieces first and then applied the brown afterwards as I ended up going back multiple times to paint over little bits of black that got onto the brown and visa-versa after correcting the previous (brown that got onto the black). (Though, this could have been an issue either way…)
> For the flower in the middle, I used a cut out I’d made out of paper to ‘trace’ around to get the shape.
- This actually didn’t turn out as I’d planned, but it ended up looking nice anyway. ^-^
Method – Koban Storage Units:

Print out your 3 (or however many you need for the number of rolls you’ll be covering) koban wrapper sheets. (If your printer has a ‘Fit to Frame’ option, make sure it’s selected before printing.)
Cut out the wrappers; removing the black outlines as you do so. (Tip: Cut over a white or light
background so you can easily see any black outline you may have missed.)
Prep the cardboard support discs for the base of your rolls.
> Using one of the rolls as a ‘template’, draw around the outside of one end of the roll with a pencil onto the cardboard to get the shape of the discs.
- Do this for as many rolls as you are making and then cut the discs out. (Don’t forget to erase the pencil marks that have gotten onto the roll you used as a template so it can be clean when you use it for the craft. ^-^)
Prep the paper covers for the tops of your rolls.
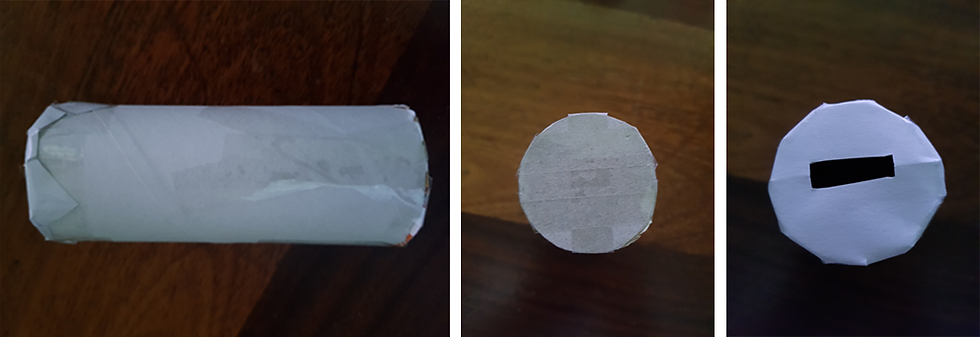
> For my rolls, I cut 5 x 5cm squares of paper and, at 2.5cm increments on each side of the square, I cut ±3mm slits to make fitting the square onto the top of the roll easier.
> The coin slits in the tops were kind of ‘off the cuff’ cuts, but were roughly in the middle of the squares and, generally, 3mm deep by 2cm long. (I folded the square in half and then cut the 3mm slits roughly 2cm apart. I then carefully cut away the paper between them to achieve the slit.)
Assembling the rolls.

> Tape the base supports onto the base of your rolls.
- I placed the base (raw cardboard side facing out) on one end of the roll and then placed one strip of tape across the centre of it, adhering it to the roll. I then added 2 more strips either side of the centre one; sticking their ends down in a diagonal across the centre one. I then added a final straight strip in the opposite direction to the previous three for more stability.
> Tape the paper tops on.
- I carefully pressed the paper down and gently folded the 4 corners down against the roll; this was to make the next step easier and to check the paper was, more or less, in the right spot. I then taped the 4 corners down; taping diagonal pairs. (A.K.A Tape North then South. Tape East then West.) Then I smoothed down the remaining paper that was sticking up and stuck those down with more tape.

> Tape on the koban wrappers.
- I’d look for where the slit I’d cut would end up once the wrapper was on and the roll would be placed in the box. I was looking for what position would seem to keep the money inside the roll when it was lying down and then tape the wrapper on accordingly. Once I’d figured out how I wanted the roll to lie in the chest, I’d place the wrapper onto it; wrapping it around to check the fit. Then, with a small piece of tape, I’d tape down one side of the wrapper to hold it in place and secure it to the roll. Finally, I’d run a piece of tape down the line where the two ends of the wrapper meet to finish the job.
Comments:
It’s been quite a while since I last did a craft like this. While a little ‘fiddly’ in places, it was fun and I really like how it came out. ^-^ I’d been inspired by the chests of koban in the game and in the Hanamaru series to create this and I’m glad I finally got to do it. ^-^
Something I hadn’t anticipated from this build was how I feel the chest could make a very pretty ‘shelf’ or stand for something that could sit on top of it (and keep it closed). ^-^ In a way, this could be its own ‘camouflage’… It’s not a chest full of money, it’s just a decorative box with some ornament on top… Nothing to see here. Keep moving. (XD)
So, what do you think? Are you going to make a koban storage chest of your own? If so, I’d love to see it when it’s done. Remember, you’re free to design your own chest in whatever way you want; put your own spin on it! Use the hashtag #fansideoflife if you post your pictures on twitter or Contact me.
Until next time, keep enjoying your fan side of life!


Comments